Anna's Rubik's Cube Quest
Learn to solve a 3×3 Rubik's Cube through eight calm checkpoints, then practise each move recipe without a timer.
- Time
- ⏱️ A few short sessions
- Difficulty
- ●●● Trickier
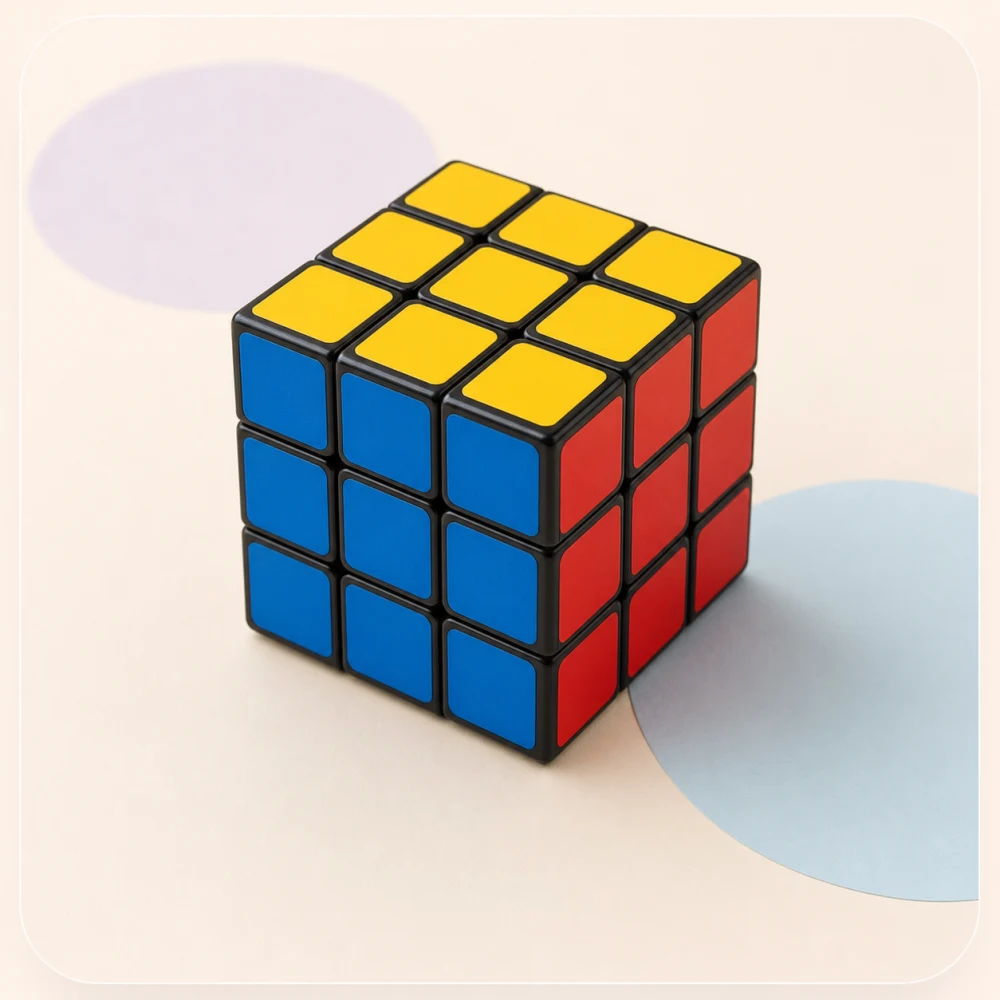
What you'll need
- A standard 3×3 Rubik's Cube
- A flat table with good light
- A grown-up nearby for clues and cube holding
A calm first-solve guide
Your first cube solve starts here
First see the finish. Then put yellow on top and make one white petal. We will show every hold and turn after that.
What does “solved” mean?
Every face becomes one solid colour. The centre square tells you which colour belongs on that face.
The little shapes appear only in our pictures to help tell colours apart. Your real cube may have colour only.
Do not try to make one pretty face by itself. We solve pieces in layers so their side colours match too.
Pick up the cube. Do this now.
Do not learn move letters yet. Your first job is only to find the top and one white edge.
- 1 Find the yellow centre
Look for the yellow square in the exact middle of a face.
- 2 yellow
on topPut yellow on topTurn the whole cube in your hands until the yellow centre points at the ceiling. Keep it there.
- 3 Find one white edge
Search for a piece with white and one other colour. Ignore pieces with three colours for now.
Whole cube or one face? Turning the whole cube in your hands changes your view. A move turns just one layer while the other two layers stay still.
Three kinds of piece
The number of colours tells you which kind you are holding. A piece never changes its kind.
Centre
1 colour. It names the face and stays in the middle.
Edge
2 colours. Four edge pieces make a cross.
Corner
3 colours. Its home is between three matching centres.
When a recipe shows a letter
The letter names the face to turn. The tiny map highlights that face. Most recipes here use R, L, U, and F.
R means turn the right face clockwise while looking straight at that face.
R' means turn it anticlockwise. Cubers say “R prime.”
R2 means turn it halfway around. The direction does not matter.
Point the named face toward your eyes.
Imagine a clock drawn on that face: ↻ clockwise, ↺ anticlockwise, or ↔ halfway around. Then return to the hold shown in the checkpoint.
Our diagrams use colour and a symbol together:
Checkpoint 1 of 8
Make a white daisy
You are making this
Checkpoint sketch: Top face with a yellow star centre and four white circle edge tiles forming a daisy.
Your tiny goal
Put the four white edge tiles around the yellow centre.
Hold it like this
Keep the yellow centre on top. You may rotate the cube left or right like a carousel while you search, without tipping yellow away from the top.
Find this
Find edge pieces with white on them. An edge has two colours.
Do this
- Find one piece with a white sticker and one other colour. Use an edge, not a three-colour corner.
- Move that white edge into an empty spot beside the yellow centre. Match its starting place to one of the pictures in this guide.
- Before adding another edge, turn only the top layer so an empty petal spot is waiting.
- Repeat until four white edge stickers touch the yellow centre.
Match your white edge to a picture
Keep the yellow centre on top. Choose the picture that looks most like where your white edge is now.
White is already on top
Leave it beside yellow. Turn only the top later if you need an empty petal spot.
White is in the middle belt
Turn that side once to lift the white edge to the top. Move a finished petal away first.
White points down
Turn that side halfway around. If white points sideways in the bottom row, move it to the middle first.
Your first win: stop after one white petal reaches yellow. Check the hold, smile at it, then find the second white edge.
Ready to continue when
Four white petals touch the yellow centre. The side colours do not need to match yet.
Not matching yet?
If a new petal would bump an old one away, turn only the top layer to make an empty space first.
Tiny practice: Make the daisy, mix only those top edges, then make it once more.
Checkpoint 2 of 8
Build the matched white cross
You are making this
Checkpoint sketch: White face with a hollow-circle centre and four white circle edge tiles forming a cross.
Your tiny goal
Move each daisy petal down to make a white cross with matching side colours.
Hold it like this
Keep yellow on top. Put the side colour of one petal at the front.
Find this
Turn the top until that petal's side colour matches the centre below it.
Do this
- Choose one white petal and look at its other colour on the side of the cube.
- Turn only the top layer until that side colour sits above the centre of the same colour.
- Keep that matching side at the front. Turn the front face halfway around, which is two quarter-turns.
- The white sticker moves to the bottom. Repeat with the other three petals.
Move one matched petal down
Say it: front twice.
F2 - F2 front face, halfway around F2: turn the front face halfway around. The diagram shows the F face and an arrow for halfway around.
Use this only after the petal's side colour matches the front centre.
Hold the cube as shown, then choose Show first move. The coach changes the instruction highlight, not your physical cube.
Ready to continue when
White makes a cross on the bottom, and every side edge matches its centre. That is a solved cross, not just a white face.
Not matching yet?
If the side colours do not match, bring that white edge back to the top and line up its other colour before the half-turn.
Tiny practice: After a few solves, try finding one matched white edge without making the daisy first.
Checkpoint 3 of 8
Finish the white layer
You are making this
Checkpoint sketch: A complete white face, showing that all four white corners have joined the white cross.
Your tiny goal
Put all four white corner pieces between their matching centres.
Hold it like this
Keep the white cross on the bottom. Put the corner you want above its home at the front-right or front-left.
Find this
A corner has three colours. Find the home between those three centre colours, whatever direction its tiles face, then place the corner above that home.
Do this
- Find a corner with white. Read all three colours on that one corner.
- Find the three matching centres, then turn the top layer until the corner sits above that home.
- Hold the corner at front-right and repeat Righty, or hold it at front-left and repeat Lefty.
- Stop when that corner is in its home and the bottom row still matches. Then choose the next white corner.
Righty
Say it: right up, top across, right down, top back.
R U R' U' - R right face, clockwise R: turn the right face clockwise while looking straight at that face. The diagram shows the R face and an arrow for clockwise.
- U top face, clockwise U: turn the top face clockwise while looking straight at that face. The diagram shows the U face and an arrow for clockwise.
- R' right face, anticlockwise R': turn the right face anticlockwise while looking straight at that face. The diagram shows the R face and an arrow for anticlockwise.
- U' top face, anticlockwise U': turn the top face anticlockwise while looking straight at that face. The diagram shows the U face and an arrow for anticlockwise.
Always finish all four moves, even if the corner looks solved after move three.
Hold the cube as shown, then choose Show first move. The coach changes the instruction highlight, not your physical cube.
Lefty
Say it: left up, top across, left down, top back.
L' U' L U - L' left face, anticlockwise L': turn the left face anticlockwise while looking straight at that face. The diagram shows the L face and an arrow for anticlockwise.
- U' top face, anticlockwise U': turn the top face anticlockwise while looking straight at that face. The diagram shows the U face and an arrow for anticlockwise.
- L left face, clockwise L: turn the left face clockwise while looking straight at that face. The diagram shows the L face and an arrow for clockwise.
- U top face, clockwise U: turn the top face clockwise while looking straight at that face. The diagram shows the U face and an arrow for clockwise.
This is the mirror recipe for a corner held at the front-left.
Hold the cube as shown, then choose Show first move. The coach changes the instruction highlight, not your physical cube.
Ready to continue when
The bottom face is white and the bottom row of every side matches its centre.
Not matching yet?
A white corner stuck in the bottom but in the wrong home can be lifted out with one full Righty, then placed again.
Tiny practice: Do Righty six times on a solved cube. It returns home and helps your hands learn the rhythm.
Checkpoint 4 of 8
Fill the middle layer
You are making this
Checkpoint sketch: Two solved layers with matching bottom and middle rows around the cube.
Your tiny goal
Put the four edge pieces without yellow into the middle row.
Hold it like this
Keep white on the bottom and yellow on top. Face the side colour of your chosen top edge after matching it to its centre.
Find this
Choose a top edge with no yellow. Its top colour tells you whether its home is on the left or right.
Do this
- Find a top edge with no yellow. Match its front colour to the centre below it.
- Look at the edge's other colour on top. Its matching centre tells you whether the edge goes left or right.
- Keep the matched centre at the front and do the Middle left or Middle right recipe once.
- If every top edge has yellow, use a middle recipe to lift one wrong middle edge to the top, then place it correctly.
Middle right
Say it: top clockwise, right clockwise, top back, right back; top back, front back, top clockwise, front clockwise.
U R U' R' U' F' U F - U top face, clockwise U: turn the top face clockwise while looking straight at that face. The diagram shows the U face and an arrow for clockwise.
- R right face, clockwise R: turn the right face clockwise while looking straight at that face. The diagram shows the R face and an arrow for clockwise.
- U' top face, anticlockwise U': turn the top face anticlockwise while looking straight at that face. The diagram shows the U face and an arrow for anticlockwise.
- R' right face, anticlockwise R': turn the right face anticlockwise while looking straight at that face. The diagram shows the R face and an arrow for anticlockwise.
- U' top face, anticlockwise U': turn the top face anticlockwise while looking straight at that face. The diagram shows the U face and an arrow for anticlockwise.
- F' front face, anticlockwise F': turn the front face anticlockwise while looking straight at that face. The diagram shows the F face and an arrow for anticlockwise.
- U top face, clockwise U: turn the top face clockwise while looking straight at that face. The diagram shows the U face and an arrow for clockwise.
- F front face, clockwise F: turn the front face clockwise while looking straight at that face. The diagram shows the F face and an arrow for clockwise.
The edge's top colour belongs on the right.
Hold the cube as shown, then choose Show first move. The coach changes the instruction highlight, not your physical cube.
Middle left
Say it: top back, left back, top clockwise, left clockwise; top clockwise, front clockwise, top back, front back.
U' L' U L U F U' F' - U' top face, anticlockwise U': turn the top face anticlockwise while looking straight at that face. The diagram shows the U face and an arrow for anticlockwise.
- L' left face, anticlockwise L': turn the left face anticlockwise while looking straight at that face. The diagram shows the L face and an arrow for anticlockwise.
- U top face, clockwise U: turn the top face clockwise while looking straight at that face. The diagram shows the U face and an arrow for clockwise.
- L left face, clockwise L: turn the left face clockwise while looking straight at that face. The diagram shows the L face and an arrow for clockwise.
- U top face, clockwise U: turn the top face clockwise while looking straight at that face. The diagram shows the U face and an arrow for clockwise.
- F front face, clockwise F: turn the front face clockwise while looking straight at that face. The diagram shows the F face and an arrow for clockwise.
- U' top face, anticlockwise U': turn the top face anticlockwise while looking straight at that face. The diagram shows the U face and an arrow for anticlockwise.
- F' front face, anticlockwise F': turn the front face anticlockwise while looking straight at that face. The diagram shows the F face and an arrow for anticlockwise.
The edge's top colour belongs on the left.
Hold the cube as shown, then choose Show first move. The coach changes the instruction highlight, not your physical cube.
Ready to continue when
The bottom two rows of all four side faces match their centres.
Not matching yet?
Check that the edge has no yellow and that its front colour matches the front centre before choosing left or right.
Tiny practice: Ask a grown-up to prepare one right insertion and one left insertion. Practise each without a timer.
Checkpoint 5 of 8
Make the yellow cross
You are making this
Checkpoint sketch: Yellow face with a star centre and four yellow star edge tiles forming a cross.
Your tiny goal
Turn the yellow edge tiles upward to make a cross. Ignore the corners for now.
Hold it like this
Keep yellow on top. For a line, hold it left-to-right. For an L, hold its two yellow arms at the back and left.
Find this
Look only at the four top edge tiles: dot, L, line, or cross.
Do this
- Ignore the four corner stickers. Look only at the four edge stickers around the yellow centre.
- Name the pattern: dot, L, line, or cross. Hold a line left-to-right. Hold an L at the back-left.
- Keep yellow on top and do the Yellow cross recipe once.
- Look again, set up the new pattern, and repeat until all four yellow edge stickers face up.
Yellow cross
Say it: front, Righty, front back.
F R U R' U' F' - F front face, clockwise F: turn the front face clockwise while looking straight at that face. The diagram shows the F face and an arrow for clockwise.
- R right face, clockwise R: turn the right face clockwise while looking straight at that face. The diagram shows the R face and an arrow for clockwise.
- U top face, clockwise U: turn the top face clockwise while looking straight at that face. The diagram shows the U face and an arrow for clockwise.
- R' right face, anticlockwise R': turn the right face anticlockwise while looking straight at that face. The diagram shows the R face and an arrow for anticlockwise.
- U' top face, anticlockwise U': turn the top face anticlockwise while looking straight at that face. The diagram shows the U face and an arrow for anticlockwise.
- F' front face, anticlockwise F': turn the front face anticlockwise while looking straight at that face. The diagram shows the F face and an arrow for anticlockwise.
Keep yellow on top for the whole recipe.
Hold the cube as shown, then choose Show first move. The coach changes the instruction highlight, not your physical cube.
Ready to continue when
All four top edge tiles are yellow. The side colours may still be mixed.
Not matching yet?
If you see one or three yellow edge tiles, stop. A single flipped edge cannot happen through normal turns, so ask a grown-up to check the cube.
Tiny practice: Name the dot, L, line, and cross before touching the cube. Case spotting is part of solving.
Checkpoint 6 of 8
Match the yellow edges
You are making this
Checkpoint sketch: Yellow cross with all four side edge colours matched to their centre tiles.
Your tiny goal
Make the four side colours under the yellow cross match their centres.
Hold it like this
Keep yellow on top. Turn the top until two side edges match. Hold matching neighbours at the back and right.
Find this
You may find two matching neighbours, two matching opposites, or all four already matched.
Do this
- Turn only the top layer and check all four side colours under the yellow cross.
- If all four match their centres, this checkpoint is already finished.
- If two neighbours match, hold those matching sides at the back and right. If two opposite sides match, do the recipe from any side first.
- Do Match edges, then turn only the top layer to line up the side colours. Repeat if needed.
Match edges
Say it: right up, look underneath, move away and back.
R U R' U R U2 R' U - R right face, clockwise R: turn the right face clockwise while looking straight at that face. The diagram shows the R face and an arrow for clockwise.
- U top face, clockwise U: turn the top face clockwise while looking straight at that face. The diagram shows the U face and an arrow for clockwise.
- R' right face, anticlockwise R': turn the right face anticlockwise while looking straight at that face. The diagram shows the R face and an arrow for anticlockwise.
- U top face, clockwise U: turn the top face clockwise while looking straight at that face. The diagram shows the U face and an arrow for clockwise.
- R right face, clockwise R: turn the right face clockwise while looking straight at that face. The diagram shows the R face and an arrow for clockwise.
- U2 top face, halfway around U2: turn the top face halfway around. The diagram shows the U face and an arrow for halfway around.
- R' right face, anticlockwise R': turn the right face anticlockwise while looking straight at that face. The diagram shows the R face and an arrow for anticlockwise.
- U top face, clockwise U: turn the top face clockwise while looking straight at that face. The diagram shows the U face and an arrow for clockwise.
After the recipe, turn only the top until the side colours line up.
Hold the cube as shown, then choose Show first move. The coach changes the instruction highlight, not your physical cube.
Ready to continue when
The yellow cross remains on top and all four side edges match their centres.
Not matching yet?
If the two matches are opposite, do the recipe from any side. Then find the new neighbouring pair and put it at back-right.
Tiny practice: Before each try, point to the matching pair and say where you will hold it.
Checkpoint 7 of 8
Put yellow corners in their homes
You are making this
Checkpoint sketch: All top corners sit between their three matching centre colours, although some yellow tiles face sideways.
Your tiny goal
Move every yellow corner between the three centres that share its colours. Yellow may face sideways.
Hold it like this
Keep yellow on top. If one corner is already in the correct home, hold it at the top-front-right.
Find this
A corner is home when all three of its colours belong between the three nearby centres, even if the tiles point the wrong way.
Do this
- Check one top corner at a time. Compare all three of its colours with the three nearby centres.
- If every corner is already in its home, skip the recipe. Yellow does not need to face up yet.
- If one corner is home, hold it at top-front-right. If none are home, start from any side.
- Do Place corners once, check again, then hold a correct corner at top-front-right and repeat if needed.
Place corners
Say it: top and right up, top and left up, then both come down.
U R U' L' U R' U' L - U top face, clockwise U: turn the top face clockwise while looking straight at that face. The diagram shows the U face and an arrow for clockwise.
- R right face, clockwise R: turn the right face clockwise while looking straight at that face. The diagram shows the R face and an arrow for clockwise.
- U' top face, anticlockwise U': turn the top face anticlockwise while looking straight at that face. The diagram shows the U face and an arrow for anticlockwise.
- L' left face, anticlockwise L': turn the left face anticlockwise while looking straight at that face. The diagram shows the L face and an arrow for anticlockwise.
- U top face, clockwise U: turn the top face clockwise while looking straight at that face. The diagram shows the U face and an arrow for clockwise.
- R' right face, anticlockwise R': turn the right face anticlockwise while looking straight at that face. The diagram shows the R face and an arrow for anticlockwise.
- U' top face, anticlockwise U': turn the top face anticlockwise while looking straight at that face. The diagram shows the U face and an arrow for anticlockwise.
- L left face, clockwise L: turn the left face clockwise while looking straight at that face. The diagram shows the L face and an arrow for clockwise.
Keep the same front face during the full recipe.
Hold the cube as shown, then choose Show first move. The coach changes the instruction highlight, not your physical cube.
Ready to continue when
All four corners are in their correct homes. Some yellow tiles may still face sideways.
Not matching yet?
Do not judge a corner by the direction of its yellow tile. Compare all three colours with the nearby centres. If exactly two corners are home, stop and ask a grown-up to check the cube because normal turns cannot make that state here.
Tiny practice: Point to a corner and name its three-colour home without turning the cube.
Checkpoint 8 of 8
Turn the last corners
You are making this
Checkpoint sketch: A solved cube with every face returned to one matching colour and symbol.
Your tiny goal
Turn each correctly placed corner until yellow faces down and the cube is solved.
Hold it like this
Turn the whole cube over so yellow is on the bottom. Put an unsolved corner at bottom-front-right.
Find this
Work on only the bottom-front-right corner. The rest of the cube will look mixed for a little while.
Do this
- Turn the whole cube over so yellow is on the bottom. Keep this same front face for the rest of the checkpoint.
- Put one unsolved yellow corner at bottom-front-right.
- Repeat the complete four-move Righty until that corner's yellow sticker points down. The cube will look mixed for a moment.
- Turn only the bottom layer to bring the next unsolved corner to bottom-front-right. Do not rotate the whole cube.
- When all four yellow stickers point down, turn only the bottom layer until every side lines up.
Righty, repeated
Say it: right up, top across, right down, top back.
R U R' U' - R right face, clockwise R: turn the right face clockwise while looking straight at that face. The diagram shows the R face and an arrow for clockwise.
- U top face, clockwise U: turn the top face clockwise while looking straight at that face. The diagram shows the U face and an arrow for clockwise.
- R' right face, anticlockwise R': turn the right face anticlockwise while looking straight at that face. The diagram shows the R face and an arrow for anticlockwise.
- U' top face, anticlockwise U': turn the top face anticlockwise while looking straight at that face. The diagram shows the U face and an arrow for anticlockwise.
The temporary mess is expected. Keep the cube facing the same way until every corner is finished.
Hold the cube as shown, then choose Show first move. The coach changes the instruction highlight, not your physical cube.
Ready to continue when
After every corner's yellow tile faces down, turn only the bottom layer until all side colours align. Now the whole cube is solved.
Not matching yet?
Do not rotate the whole cube between corners, and never stop Righty after move three. Finish all four moves every time.
Tiny practice: Read this whole stage before starting. Then say 'whole Righty, bottom only' each time you change corners.
Cube Practice Garden
No timer, lives, streak, or score. Pick one tiny thing and use your real cube.
Turn and return
Learn what the move letters feel like. Each pair brings the cube back home.
Recipe rhythm
Use “cover the moves ahead,” then reveal one move only when you need it.
Teach a grown-up
Point out a centre, edge, corner, and one checkpoint in your own words.
Right and return
Say it: right away, right home.
R R' - R right face, clockwise R: turn the right face clockwise while looking straight at that face. The diagram shows the R face and an arrow for clockwise.
- R' right face, anticlockwise R': turn the right face anticlockwise while looking straight at that face. The diagram shows the R face and an arrow for anticlockwise.
The cube should look exactly as it did before.
Hold the cube as shown, then choose Show first move. The coach changes the instruction highlight, not your physical cube.
Then swap in another pair:
U U' Top and return. Look straight at the top face when deciding clockwise.
F F' Front and return. Keep the rest of the cube still.
R2 R2 Two half-turns. A half-turn is the same in either direction.
Make the practice fit Anna
Colours hard to tell apart? Use the symbols in our diagrams, bright even light, and the centre tile as each face's name. Small removable symbol stickers can help a physical cube.
Left and right getting crossed? Sit beside Anna, not opposite her. Keep the front face pointing the same way for both of you.
Hands getting tired? Finish the current move recipe, park the cube on the table, open and close both hands gently, and return later.
Lost your place? Stop turning. Compare with the last checkpoint, or ask: “Would you like a clue, a demonstration, or a break?”
A gentle practice plan
Do not make the first solve a marathon. One possible rhythm is:
- Meet the pieces, practise turn-and-return, and make the daisy.
- Build the matched white cross and finish one or two white corners.
- Finish the white layer and practise one middle edge in each direction.
- Learn to spot the yellow dot, L, line, and cross patterns.
- Practise the endgame from a cube prepared by a grown-up.
- Try a full guided solve. Cover only the move recipes you already remember.
After a day or two, repeat one checkpoint that felt wobbly. Short, spaced practice is kinder to working memory than repeating full solves until everyone is tired.
If the cube seems impossible
Normal face turns cannot create exactly one flipped edge or exactly one twisted corner. If the guide’s warning signs appear, a piece may have been twisted, a sticker may have moved, or the cube may have been reassembled incorrectly. Stop repeating recipes and ask an experienced cuber to check it. Never force a stiff piece.
Grown-up notes, method choices and sources
Why we teach it this way
There are several good ways to learn a 3×3 cube. Speed methods such as CFOP are brilliant after a first solve, but they ask a beginner to recognise and remember many more cases. Camera-solving apps can rescue one scrambled cube, but they do not build a method you can use again. A long video can help with hand positions, although pausing and rewinding while holding a cube is awkward.
Our guide uses a beginner layer-by-layer method. Each checkpoint leaves a pattern you can see, photograph, and return to later. The opening daisy is training wheels for the white cross. Once that feels comfortable, try building the matched white cross directly.
The final checkpoint reuses Righty, the four-move recipe learned near the beginning. This keeps the memory load smaller. It also needs extra care: keep yellow on the bottom, turn only the bottom layer between corners, and always finish all four Righty moves.
For the grown-up beside Anna
Sit beside Anna so left and right point the same way. Let her hold and turn the cube. Ask, “Would you like a clue, a demonstration, or a break?” A clue might be as small as checking which centre is facing forward. If you demonstrate, use another cube when possible.
Avoid taking the cube away to finish a hard part. The aim is not a fast solved cube. The aim is for Anna to recognise a checkpoint, choose a move recipe, recover from a mix-up, and eventually teach one part back to you.
Sources and further help
We checked the move notation against the World Cube Association’s notation rules. The checkpoint structure follows the official Rubik’s solution guide, while the shorter repeated four-move approach is based on J Perm’s beginner method. The official Coach Cube quick reference is a useful second explanation, especially for seeing face turns. These links are optional. Everything needed for this method is written on this page.